Flow Builder
Design what happens after a scan — pages, branching, rewards, messages, and integrations — on a visual canvas.
A flow is the journey a customer takes after scanning your QR code or opening your link. You build it on a visual canvas: each step is a node, and the lines between them decide which step comes next. Flows can show pages, collect form answers, branch on rules, hand out rewards, send emails, and pass data to your other tools.
You'll find it under Rewards Hub → Flows.
Your flows list
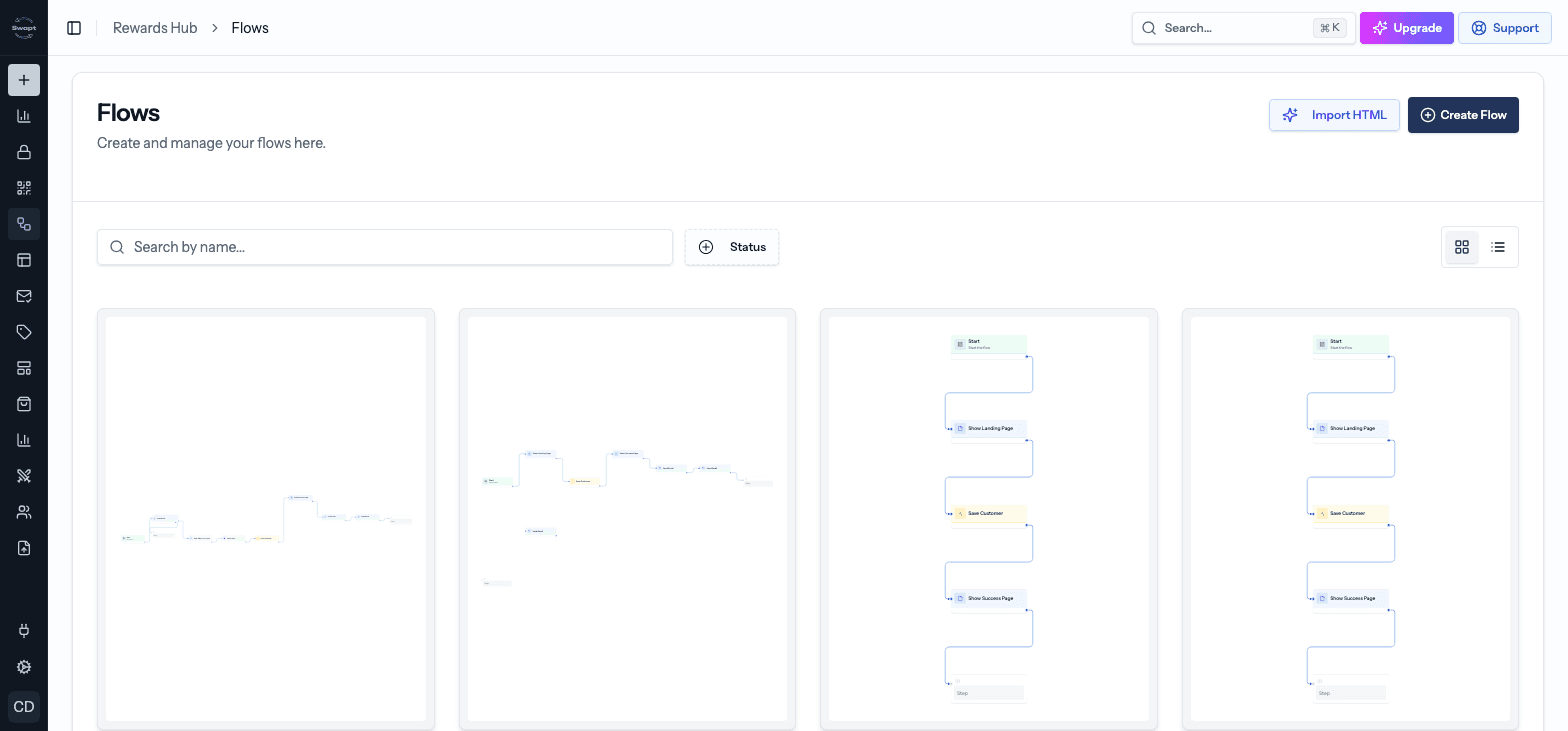
The Flows page lists every flow in your account.
- Search by name and filter by Status (Active or Draft).
- Switch between Grid view (a visual preview card per flow) and Table view.
- Click the star on a flow to add it to favorites — favorites are pinned to the top of the list.
- A small flow checks badge appears on any flow that has errors or warnings. Hover it to see what needs fixing.
- Open the Actions menu (⋯) on a row to Edit, Clone, open Button Clicks, open Node Analytics, or Delete the flow. If you manage more than one organization, Publish to organization… copies the flow — with its pages and emails — into another one.
Create a flow
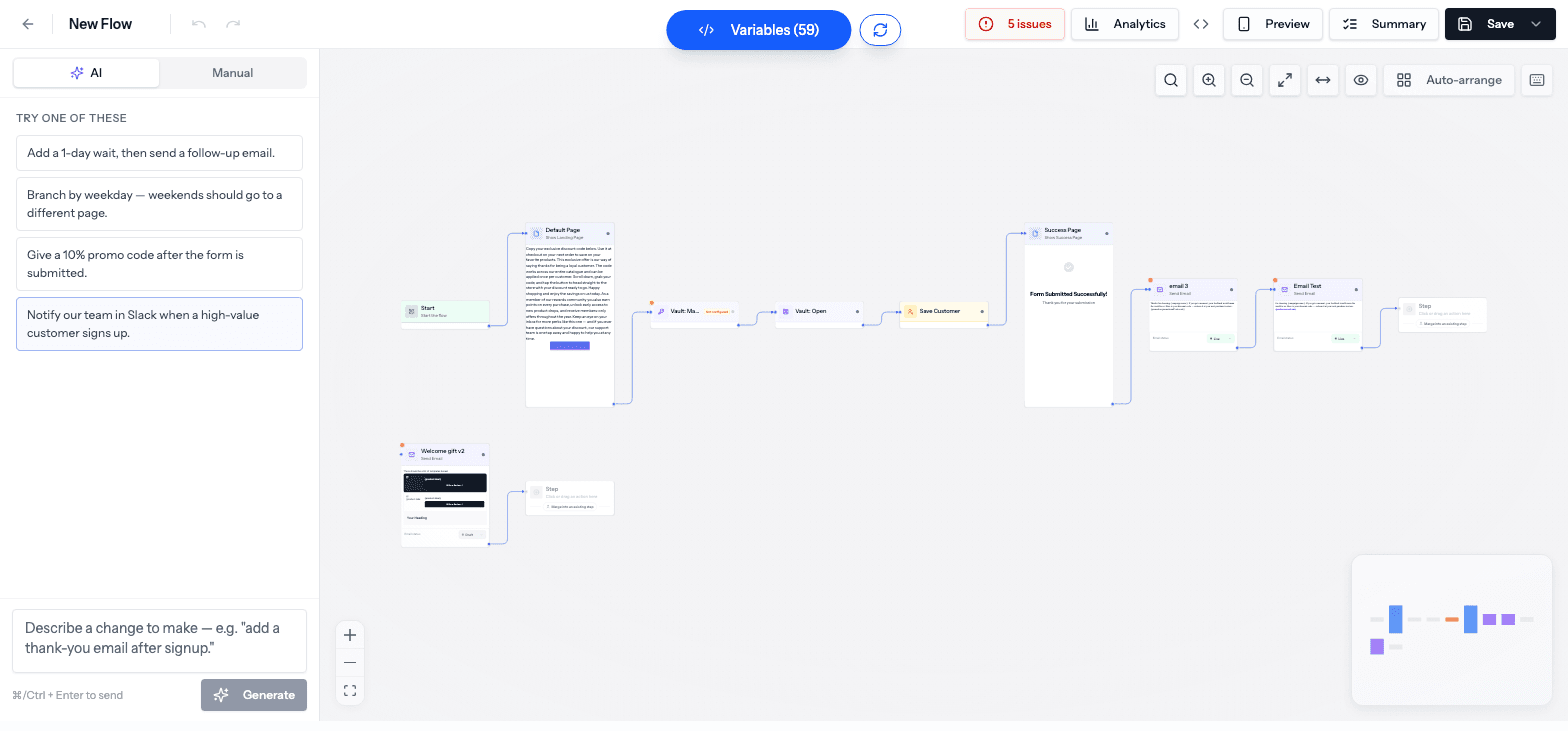
On the Flows page, click Create Flow. A new draft flow opens on the canvas, starting with a Flow Start node.
Add steps. Click a + on the canvas, then pick an action from the list on the left (or drag it onto the canvas). Start with Show Page, Send Email, or If / Then Branch. See the Node reference for everything available.
Click any node to open its settings and configure it.
Check your work with Preview or the Summary panel (see below).
Click Save and choose Save & Publish to make the flow live, or Save as Draft to keep working on it.
A flow runs when a customer scans a code or opens a link that uses it. You choose which flow a code uses in QR Campaigns.
Other ways to start
- Import HTML — already have a page designed in another tool? On the Flows page, click Import HTML and drop in a self-contained
.htmlfile. If the file uses Swapt's tags, Swapt builds a whole flow from it — capture page, success page, and the blocks wired up — ready to preview. Not built yet? The same dialog lets you copy a brief (with your brand styling included) to paste into the tool you design with. - Flow Assistant — switch the left panel from Manual to AI and describe what you want in plain English. The assistant proposes a change that you preview before applying.
Working on the canvas
The toolbar in the top-right corner of the canvas has:
- Search nodes (Ctrl+K) to jump to any step.
- Zoom In, Zoom Out, and Toggle Fullscreen.
- A layout toggle to switch the canvas between horizontal and vertical.
- A previews toggle to show or hide the page and email previews drawn inside the nodes.
- Rearrange Layout to tidy everything up automatically.
- Keyboard shortcuts (press ?).
A few other handy things:
- Undo and Redo sit next to the flow name at the top. Click the pencil next to the name to rename the flow.
- When two branches should end the same way, click Merge into an existing step on the empty + step at the end of a branch, then click the step it should join. Both paths then continue through the same step instead of duplicating it.
- Pages you give a name (in the page's settings) show that name as the node's title, so a flow with several pages stays easy to read.
Flow checks
As you build, Swapt checks your flow for problems — things like a step that isn't set up yet or a promotion with no codes left. The button next to Summary shows the result:
- Ready — no issues, the flow is good to publish.
- N issues — click it to open Flow checks. Each issue names the step it's on; click it to jump straight to that step's settings.
Errors must be fixed before the flow can be published. Warnings are worth a look, but won't stop you publishing.
Preview your flow
There are two ways to walk through a flow as a customer would. Neither one counts toward your analytics or submissions, and one-time-use links aren't used up.
Click Preview in the top bar to open Test this flow. Scan the QR code with your phone, or copy the link and share it with a teammate.
Click Summary to see every screen of your flow in order. Pick a campaign, then click Open Live Preview to walk through the flow at a real phone size.
In the live preview you can also:
- Choose a product, to see how product-specific content looks.
- Choose a country. Blocks you've limited to certain countries are hidden from visitors elsewhere, so this is the only way to see exactly what someone in another country gets. Wherever I am shows your own view.
- Choose a language — Default copy, As the visitor, or a specific language.
Personalize with variables
Steps can reuse information captured earlier in the flow — for example, a customer's name or email from a form, or the promo code they just received. Use the variables list in a step's settings to insert them, so you can personalize emails and texts or pass exactly the right data to Klaviyo, Shopify, Google Sheets, and other tools without asking the customer twice.
A few you'll use often:
{promotion.promotionalCode.code}— the promo code the customer just received.{formData.product.value}— the ASIN of the product the customer picked on the form.{formData.product.reviewUrl}— the review link for that product: Amazon's write-a-review page for Amazon products, or the Judge.me review form for Shopify products.{campaignProduct.reviewUrl}— the review link for the product attached to the campaign.
Analytics
Click Analytics in the top bar to show live numbers on each node right on the canvas. You can pick a date range and filter by campaign.
For deeper reporting, open a flow's Actions menu on the Flows page and choose Node Analytics. You'll find tabs for:
- Funnel — where customers drop off.
- Node Metrics — how each step performs.
- Paths and Transitions — the routes customers actually take.
- Node Detail — a closer look at one step over time.
- Experiments — results for any A/B tests in the flow.
See Analytics for how this ties into your overall reporting.
Tracking on your own website
The code icon in the top bar opens the tracking snippet for this flow. Add it to a page on your own website so visits there are tracked along with the rest of the flow.